CI - PHP Maven project
How to do a CI for a PHP project
Tools: Jenkins, Maven, Nexus
Press 'Space' to continue
Press 'n' to show/hide notes
Press 's' for speaker mode
Introduction
The theory: read the article
Introduction - Tools
- Maven
- Jenkins
Maven - Intro
Apache Maven is a software project management and comprehension tool. Based on the concept of a project object model (POM), Maven can manage a project's build, reporting and documentation from a central piece of information.
Official website

Maven - Intro
- Made for java projects but highly adaptable
- Most of the project configuration is inside a pom.xml file inside the project
- Introduce a Build Lifecycle
Maven - Build Lifecycle
- validate - validate the project is correct and all necessary information is available
- compile - compile the source code of the project
- test - test the compiled source code using a suitable unit testing framework. These tests should not require the code be packaged or deployed
- package - take the compiled code and package it in its distributable format, such as a JAR.
- verify - run any checks on results of integration tests to ensure quality criteria are met
- install - install the package into the local repository, for use as a dependency in other projects locally
- deploy - done in the build environment, copies the final package to the remote repository for sharing with other developers and projects.
Jenkins - Intro
Build great things at any scale
The leading open source automation server, Jenkins provides hundreds of plugins to support building, deploying and automating any project.

Jenkins - Leaderboard

Pre-requisites
- A server for CI
- Jenkins, Maven and maybe other tools installed on this server
- A development server which will be the target of the deployed product
- (recommended) Maven installed on the current machine to create the package locally before making it on jenkins
Project configuration for CI
Remember the phases

Project configuration for CI - Phase 0
Init the project inside pom.xml
<?xml version="1.0" encoding="UTF-8"?>
<project xmlns="http://maven.apache.org/POM/4.0.0" xmlns:xsi="http://www.w3.org/2001/XMLSchema-instance" xsi:schemaLocation="http://maven.apache.org/POM/4.0.0 http://maven.apache.org/xsd/maven-4.0.0.xsd">
    <modelVersion>4.0.0</modelVersion>
    <groupId>com.fakeproject</groupId>
    <artifactId>helloworld</artifactId>
    <version>0.0.1-SNAPSHOT</version>
    <name>Hello World</name>
	<build>
    </build>
</project>Project configuration for CI - Phase 1
SCM
Getting the code from SCM is a part of Jenkins' job. We will do that later.Project configuration for CI - Phase 2
Get the libs
Put all the commands you need to download libraries inside a shell script in the project. The script will be run before the compilation phase of Maven.
<build>
   ...
	<plugins>
        <plugin>
            <artifactId>exec-maven-plugin</artifactId>
            <groupId>org.codehaus.mojo</groupId>
            <version>1.6.0</version>
            <executions>
                <execution>
                    <id>Prepare phase</id>
                    <phase>generate-sources</phase>
                    <goals>
                        <goal>exec</goal>
                    </goals>
                    <configuration>
                        <executable>${basedir}/scripts/prepare/prepare.sh</executable>
                    </configuration>
                </execution>
            </executions>
        </plugin>
...Project configuration for CI - Phase 2'
Tells Maven where the sources are
As it is not a Java project, you have to tell Maven the sources location. We must exclude the Maven's working directory (aka target) and some files used or generated by Maven.
    <build>
    ...
        <resources>
            <resource>
                <directory>.</directory>
                <excludes>
                    <exclude>target/**</exclude>
                    <exclude>pom.xml</exclude>
                    <exclude>pom.xml.releaseBackup</exclude>
                    <exclude>pom.xml.tag</exclude>
                    <exclude>release.properties</exclude>
                </excludes>
            </resource>
        </resources>
...Project configuration for CI - Phase 3
The compilation
There are no real compilation in a PHP project. So, tell that to Maven
            <plugin>
                <groupId>org.apache.maven.plugins</groupId>
                <artifactId>maven-compiler-plugin</artifactId>
                <version>3.7.0</version>
                <executions>
                    <execution>
                        <id>default-compile</id>
                        <phase>none</phase>
                    </execution>
                </executions>
            </plugin>
    ...
Project configuration for CI - Phase 4
Tests
You can reuse the maven exec plugin to run a sell script in charge of running tests (like in phase 2 when getting the libs) or call a bash command. This is an example of running directly a bash command:
<execution>
    <id>phpunit</id>
    <phase>test</phase>
    <configuration>
        <executable>phpunit</executable>
        <arguments>
            <argument>--log-junit</argument>
            <argument>${basedir}/target/results/phpunit/phpunit.xml</argument>
            <argument>-c</argument>
            <argument>${basedir}/phpunit.xml.dist</argument>
        </arguments>
    </configuration>
    <goals>
        <goal>exec</goal>
    </goals>
</execution>
    ...
Project configuration for CI - Phase 5
Package: Make the rpm
Use the Maven rpm plugin which is plugged by default on the Maven's package phase.
Note: I won't describe how works a RPM. The only thing you you have to know is that a RPM is a kind of executable and one of its tasks is to move source code to a predefined destination (see the mapping tag).
 <plugin>
     <groupId>org.codehaus.mojo</groupId>
     <artifactId>rpm-maven-plugin</artifactId>
     <version>2.1.5</version>
     <extensions>true</extensions>
     <executions>
         <execution>
             <id>generate-rpm</id>
             <goals>
                 <goal>rpm</goal>
             </goals>
         </execution>
     </executions>
     <configuration>
         <license>MIT</license>
         <distribution>DISTRIBUTION</distribution>
         <group>benjdum59</group>
         <packager>benjdum59</packager>
         <defineStatements>
             <defineStatement>_unpackaged_files_terminate_build 0</defineStatement>
                  <defineStatement>_binaries_in_noarch_packages_terminate_build 0</defineStatement>
         </defineStatements>
         <mappings>
             <mapping>
                 <directory>/var/www/${project.artifactId}</directory>
                 <filemode>755</filemode>
                 <username>apache</username>
                 <groupname>apache</groupname>
                      <configuration>noreplace</configuration>
                 <directoryIncluded>true</directoryIncluded>
                 <sources>
                     <source>
                         <location>target/classes</location>
                     </source>
                 </sources>
             </mapping>
         </mappings>
     </configuration>
 </plugin>
Project configuration for CI - Phase 5'
Package: Make the rpm - post installation
RPM can run scripts before and after the installation. Create a post-install script containing all you need (e.g.: Clear cache, database migration...). As scripts may differ for a development and a production environment, you may use different scripts and call the one you need using the environment variable.
<project xmlns="http://maven.apache.org/POM/4.0.0" xmlns:xsi="http://www.w3.org/2001/XMLSchema-instance" xsi:schemaLocation="http://maven.apache.org/POM/4.0.0 http://maven.apache.org/xsd/maven-4.0.0.xsd">
...
    <packaging>rpm</packaging>
    <properties>
        <project.build.sourceEncoding>UTF-8</project.build.sourceEncoding>
        <environment>stg</environment>
    </properties>
...
	  <!-- RPM Part -->
         </mappings>
         <postinstallScriptlet>
              <scriptFile>./scripts/post-install/post-install-${environment}.sh</scriptFile>
              <fileEncoding>utf-8</fileEncoding>
         </postinstallScriptlet>
</configuration>Project configuration for CI
Test your package generation
Default value of environment is "stg" (from the example).
	  mvn clean package
	  #OR
	  mvn clean package -Denvironement=stg #does the same thing
	  #OR
	  mvn clean package -Denvironment=prod
	  #make sure you have ./scripts/post-install/post-install-prod.sh file
Project configuration for CI
Intermediate phase: send rpm to a product browser
Nexus is a great tool for product storage and is well plugged with Maven.
You have to set the repository informations (url, authentication) in the settings.xml file (in Maven installation or homeDirectory/.m2) and configure the project to use this repository.
Project configuration for CI
Intermediate phase: send rpm to a product browser
settings.xml
<?xml version="1.0"?>
<settings>
  <profiles>
    <profile>
      <id>myprofile</id>
      <repositories>
        <repository>
          <id>private-snapshot</id>
          <url>https://nexus.host.fr/nexus/content/repositories/private-snapshot/</url>
          <releases>
            <enabled>false</enabled>
          </releases>
          <snapshots>
            <enabled>true</enabled>
          </snapshots>
        </repository>
      </repositories>
    </profile>
  </profiles>
  <activeProfiles>
    <activeProfile>myprofile</activeProfile>
  </activeProfiles>
  <servers>
   <server>
      <id>private-snapshot</id>
      <username>benjdum59</username>
      <password>password</password>
    </server>
  </servers>
</settings>
Project configuration for CI
Intermediate phase: send rpm to a product browser
pom.xml
</build>
<profiles>
    <profile>
        <id>default</id>
        <activation>
            <activeByDefault>true</activeByDefault>
        </activation>
    	<distributionManagement>
            <repository>
                <id>private-releases</id>
                <url>https://nexus.host.fr/nexus/content/repositories/private-release/</url>
            </repository>
            <snapshotRepository>
                <id>private-snapshots</id>
                <url>https://nexus.host.fr/nexus/content/repositories/private-snapshot</url>
            </snapshotRepository>
        </distributionManagement>
    </profile>
</profiles>
Project configuration for CI
Intermediate phase: send rpm to a product browser
Upload rpm
mvn clean deploy -Denvironment="stg"Note: All Maven phases will be run (compile, test, package) before deploy.
Project configuration for CI
Phase 6 - Deploy the product on a development environment
This part is done with Jenkins. We will see it later.
End of Project configuration
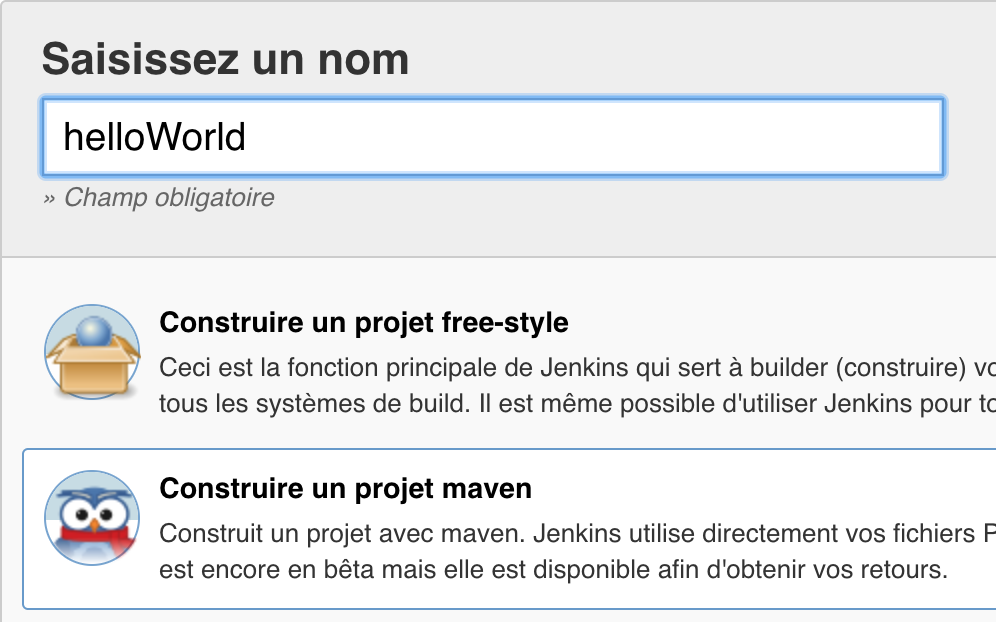
Jenkins configuration - New job
Create a new Maven job
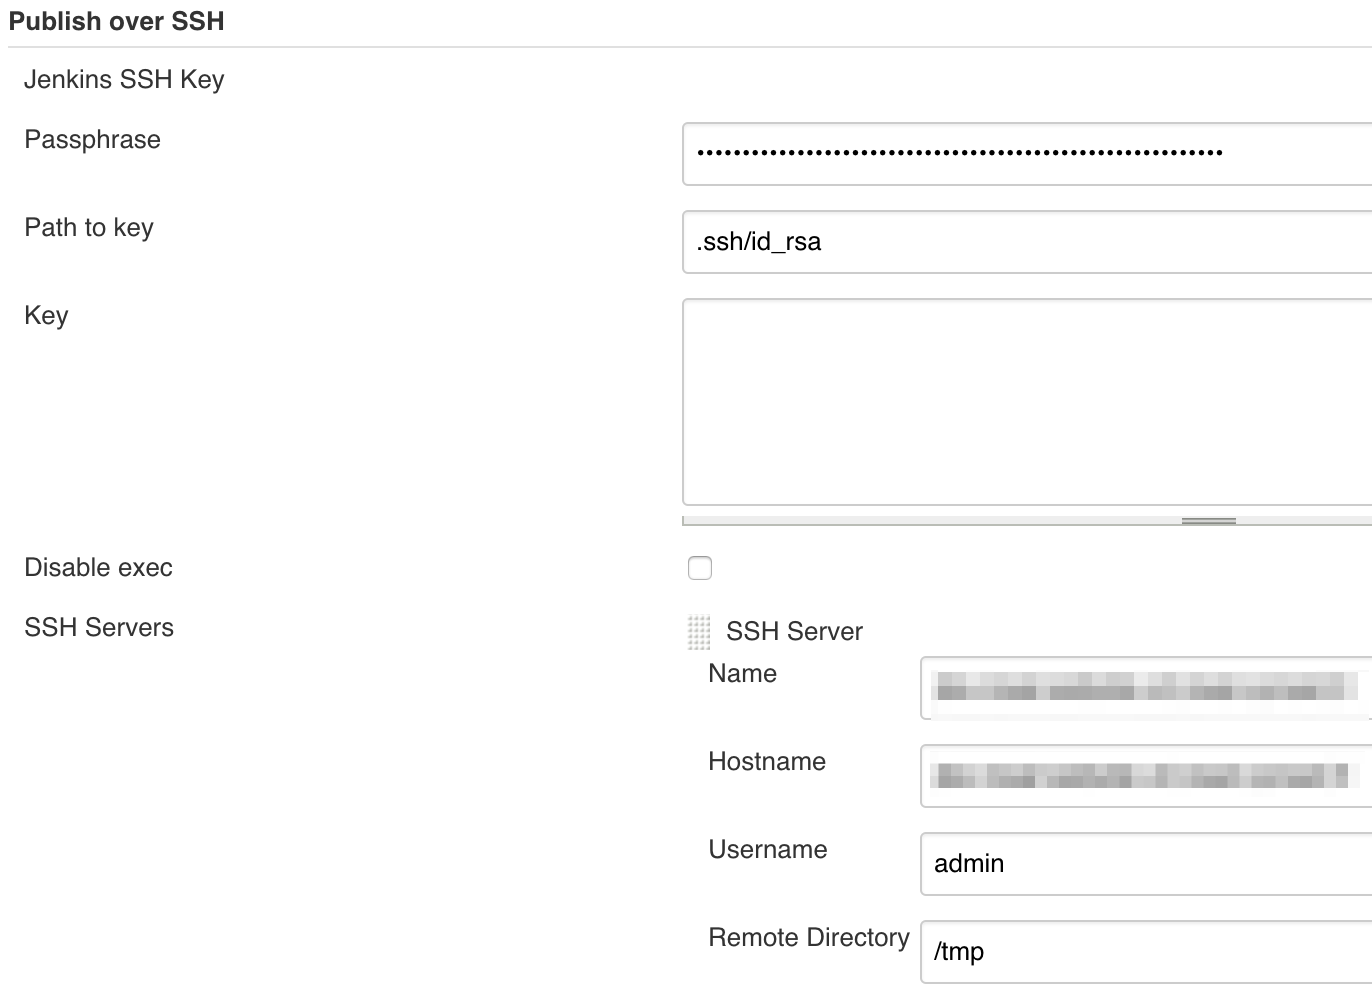
Jenkins configuration - Configure development environment for Jenkins
Install plugin "Publish Over SSH" and configure the development server to accept jenkins' public ssh key
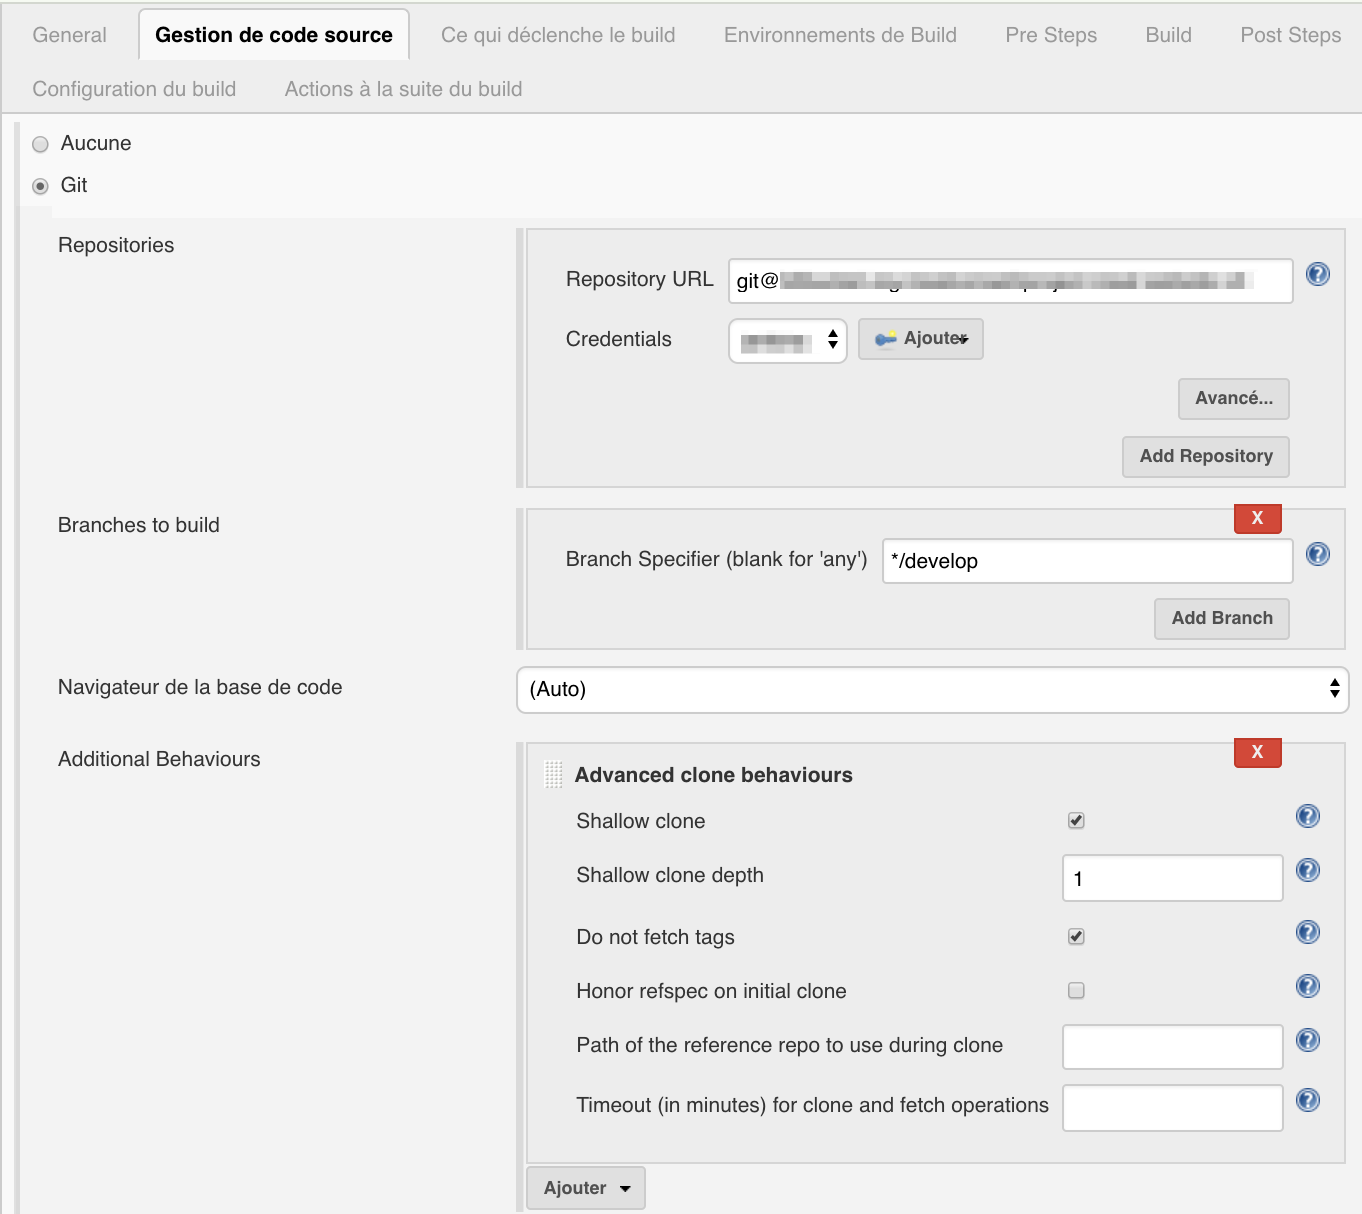
Jenkins configuration - Configure SCM in job
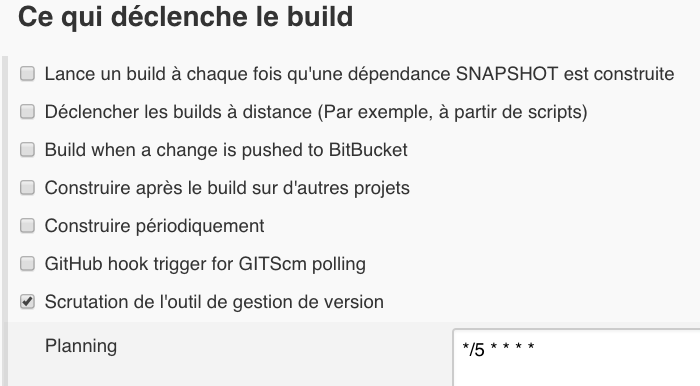
Jenkins configuration - Trigger build
Jenkins configuration - jenkins-delete-workspace
Delete workspace to be sure everything is clean!

Jenkins configuration - Pre-build steps 2
Clean product in development environment if possible
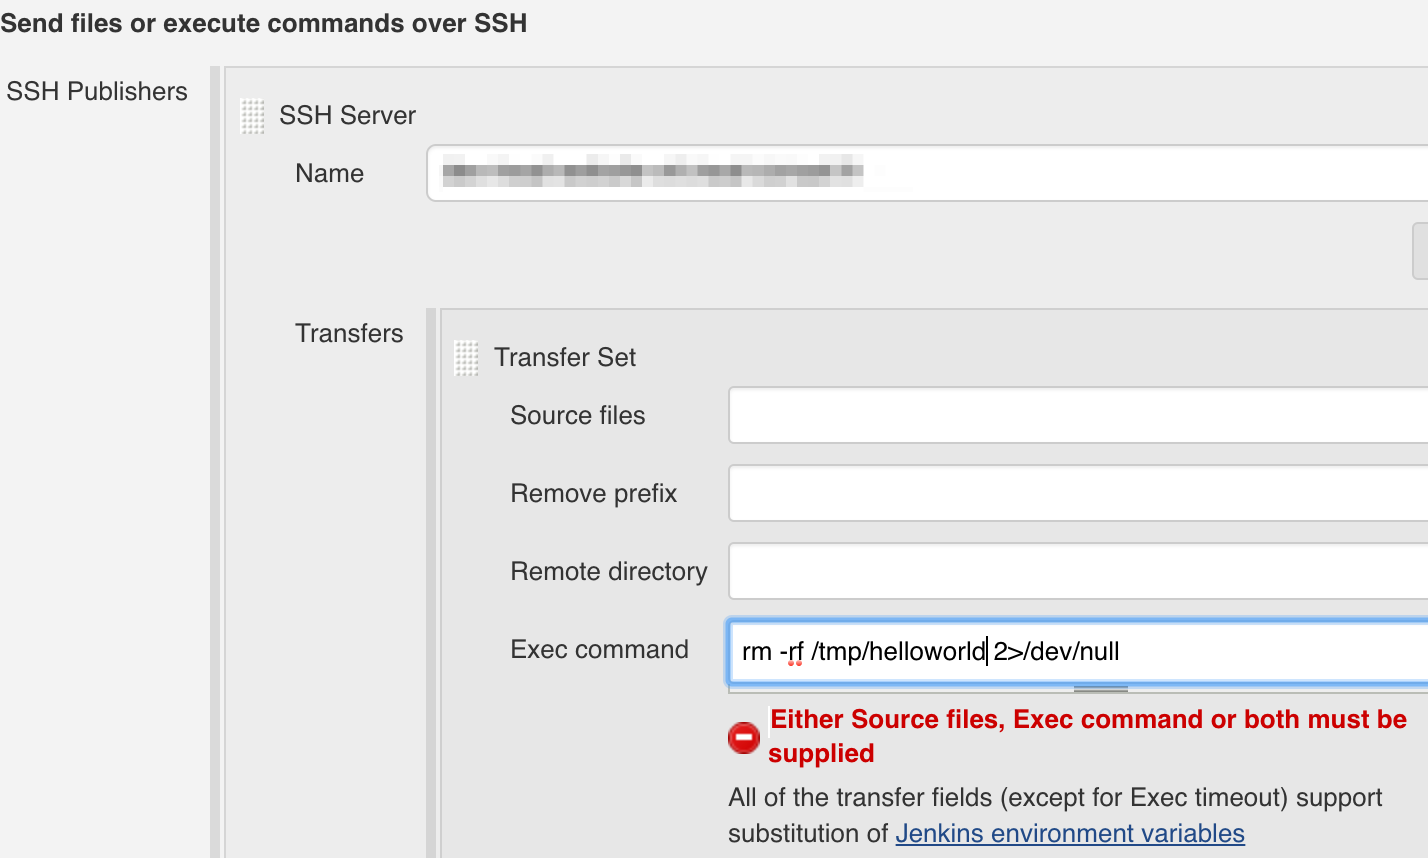
Jenkins configuration - Build step
Invoke Maven package or deploy phase.

Jenkins configuration - Post Build step
Deploy phase: send rpm to server and install it
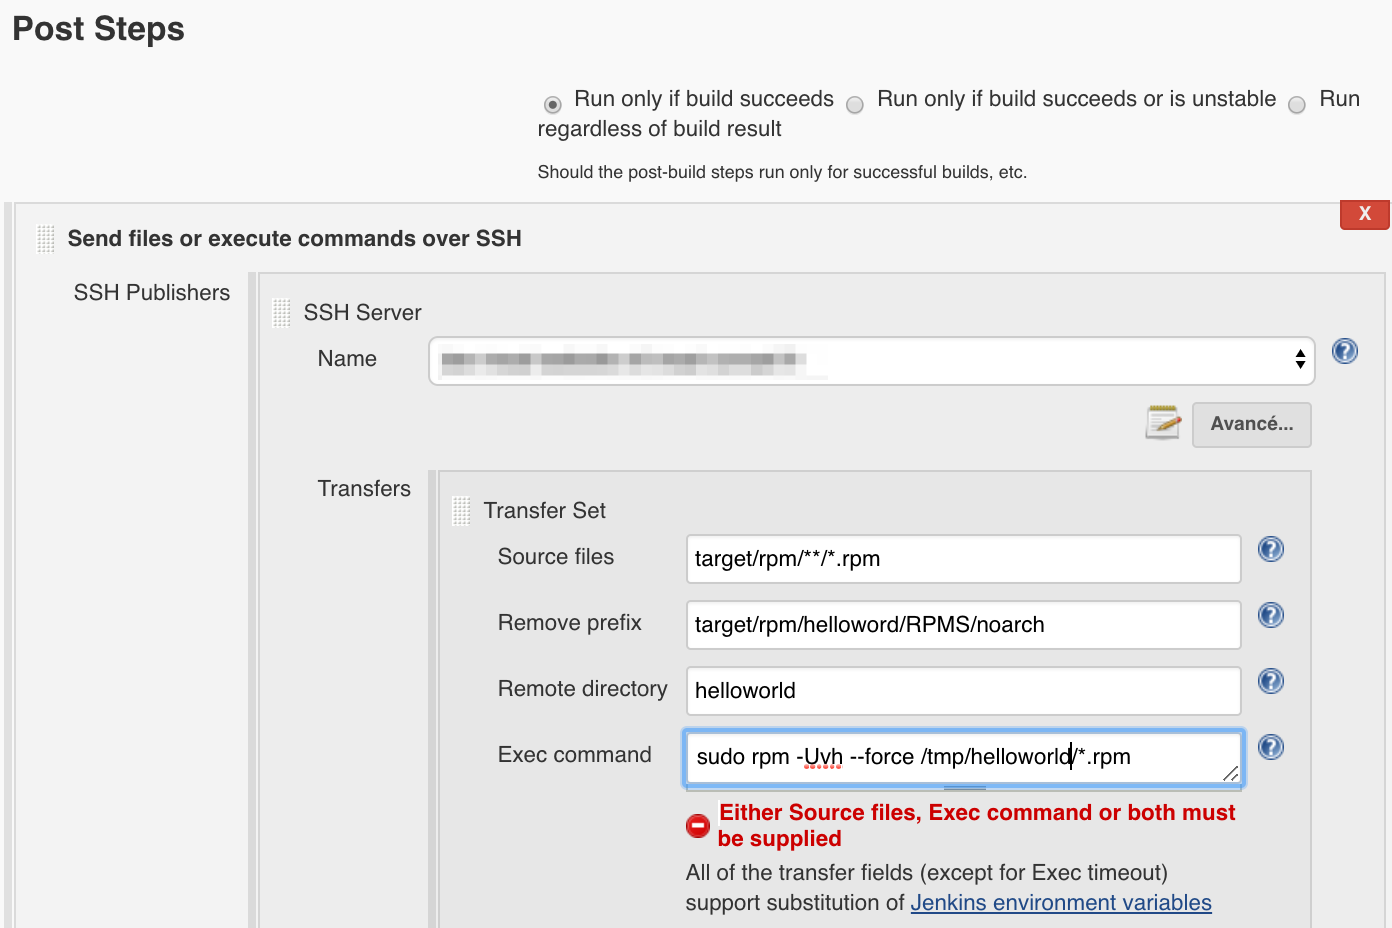
CI should work!
Make a release
Remember...

Only 2 phases to implement: tag and archive
Release with Maven
      mvn clean release:prepare
      mvn clean release:perform
mvn release:prepare
Preparing a release goes through the following release phases:
mvn release:perform
Performing a release runs the following release phases:
Configure pom.xml for release
Tells Maven the SCM configuration
	...
    <scm>
        <url>https://github.org/benjdum59/helloworld.git</url>
        <connection>scm:git:ssh://git@github.org/benjdum59/helloworld.git</connection>
        <developerConnection>scm:git:ssh://git@github.org/benjdum59/helloworld.git</developerConnection>
    </scm>
And add your Nexus repository informations in distributionManagement tag (pom.xml) and in settings.xml
Jenkins configuration - Maven Release Plugin
Install Maven Release Plugin. Now you can configure the job for release in Build environment section
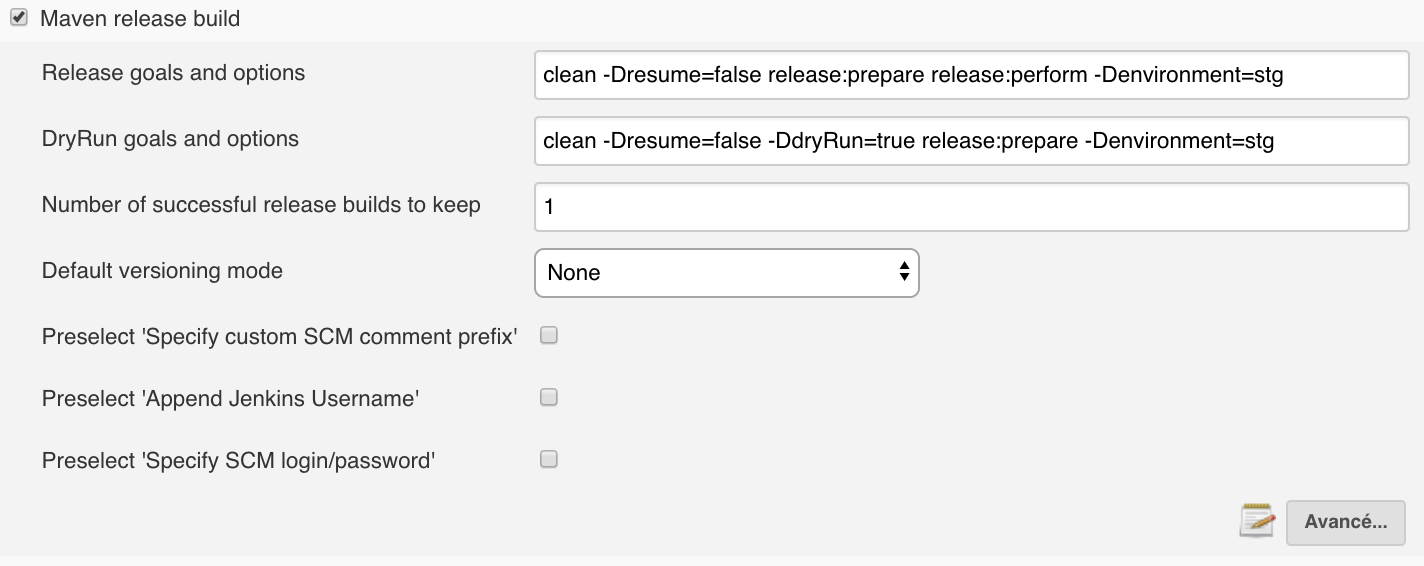
Jenkins configuration - SCM
Jenkins checkouts git repositories in detached mode. In order to be able to commit a tag, you have to be in attached mode.

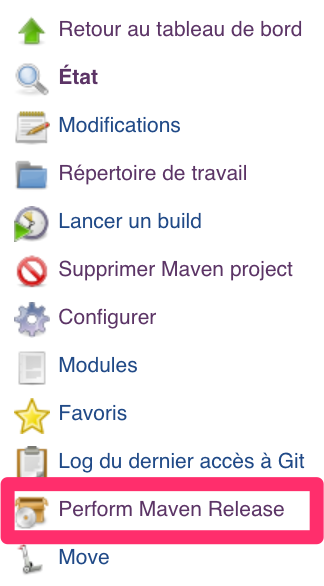
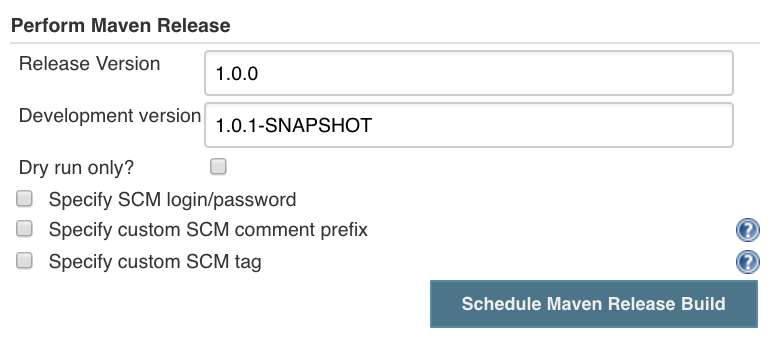
How to make a release with Jenkins
Click on Perform Maven Release and fill the form.
Where to go from here?
Static code analysis (e.g. SonarQube, Codacy)
Github: benjdum59
Website: benjdum59.github.io
Mail: benjamin.dumont.pro@gmail.com
Go to Homepage